HOW TO ; Picsart
→ in which i give you tips, tricks, step-by-step tutorials & more on how to use Picsart and what to use it for.
cover by me (using picsart)
✔ ] full-out step-by-step tutorials
✔ ] Android safe / compatible
✔ ] pub 1.9.17
✔ ] highes...
so, I'm just going to skip the basics like cropping, opening up images, etc. Hopefully you know all that already. Now we'll move on to vector covers, which I'll basically show you how to make the vector first, and then switch it to a cover. I made a video on how I made the vector png, so if you'd like to watch it, it's up there in multi media!
VECTOR COVERS LEVEL of DIFFICULTY ; 2/5
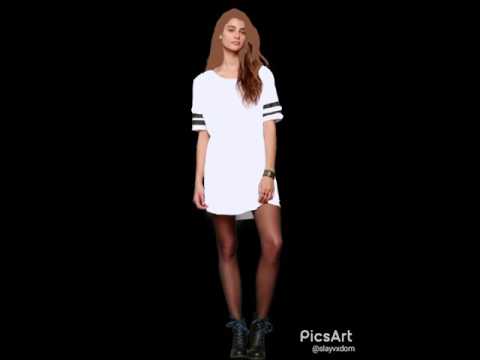
1. First take your png, and in my case, I used the lovely Taylor Marie Hill, and open it in edit. It should look like the below image.
Oops! This image does not follow our content guidelines. To continue publishing, please remove it or upload a different image.
2. now go down to the bottom, scroll to the right of the toolbar and click on draw.
Oops! This image does not follow our content guidelines. To continue publishing, please remove it or upload a different image.
3
. When you get to draw, it will show the png with its distinct checkered ''png'' background and all. Here is where you will be vectoring the png. Take your finger and press down for a while, and then move the circle that will pop up to the place you will be coloring over. The brush palette will change the color of the brush to the most similar color of the part of the png you chose. It should look like below. Continue doing this with each different color / part. KEEP THE COLOR OF THE FACE & ARMS SAME. I used the color provided for the legs, (which is different from arms and legs) because she was wearing pantyhose, stocking, idk
Oops! This image does not follow our content guidelines. To continue publishing, please remove it or upload a different image.
4. Now, you start coloring. One thing to remember; vectors are not about detail. Sure, you can keep in and vector some stripes on the shirt, or a big flower on the shirt. However, things like beads on a bracelet, shoelaces, etc. you don't want to include. That includes the person's face. ALSO REMEMBER TO USE THE FIRST BRUSH OFFERED, THE HARD BRUSH. DO NOT USE A SOFT BRUSH.