

Some may wonder why they should bother to use a full-color, full-value under painting. And the answer is you don't always have to. But when a complex subject presents itself and demands to be painted with an accuracy that challenges other techniques I often resort to this method.
The main advantage to doing a full value, full color underpainting is it gives expanded preparation time. If you take more time for preparation it allows more time to make corrections and meditate on what you are trying to say visually. Slowing the process gives you more time to make decisions.
STEPS TO PREPARING A FUL VALUE/FULL COLOR UNDERPAINTING
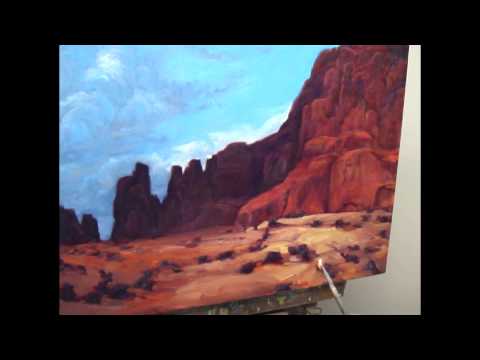
Step 1: After I draw the scene onto my canvas I begin to slowly tint the canvas with pigment. I use a lot of mineral spirits at this point (usually Gamlin's Gamsol). Paint thinned with mineral spirits dries quickly so I can correct color and value during the next painting session by loosely painting over the areas needing adjustment. At this phase all I worry about is hue and value. If I make mistakes and paint a distant mesa too dark I can scumble a lighter, bluer color over the top and slowly refine the color and value. As I do this I find that the quality of the paint surface becomes busy and blotchy, especially close up. From a distance the everything blends together and looks better. I only judge the painting from a distance because I don't want to worry about surface quality yet. When I'm satisfied how the painting looks from a distance, that is, the approximate hues and value generally describe my vision for the painting, the underpainting is done and I proceed to the next phase.
Step 2: After the underpainting is completely dry I coat the canvas, also referred to as oiling up the canvas, using a variety of oil mixtures. This layer of medium on the canvas is often referred to as a couche (pronounced KOOSH, which is French for coat). I generally use Gamblin's G-gel which I occasionally mix with chalk to make a thicker mixture (see chapter 5 for more information) or I use a g-gell mix that is thickened over several days after which I add a small quantity of poppyseed oil (to halt the speed of drying).
I then mix up a series of pigments and closely match the hues and values to the canvas surface. I ensure correct values by holding up the brush with a bit of paint on the tip. In this way value and hue can be matched with extreme accuracy. Once I get a correct mixture I mix up mounds of broken color and apply this color using the methods described in chapter x on loading the brush).
I ensure the color has a wide amount of color variation by mixing up complementary hues of the same values and adding them by loading the brush (see chapter 5). A thick medium applied as a couche allows me to apply thicker paint. I generally like a thick medium that has a lot of body that pulls the paint off my brush. If you apply thick paint into a thin couche your brush will pull the couche off the canvas rather than lay down a stroke of color. If you are planning on painting several layers of pigment, allowing each layer to dry before adding the next layer of paint, order your applications accordingly gradually increasing the thickness of the couche and reserving your thickest medium for the last layer.
For those who wonder if this technique is worth the effort I can only say that with some subjects this method will ensure success when others fail. I find that as long as I don't get impatient the process is extremely enjoyable. This method helps ensure accurate color and value and provides a safety net in the challenging and often exasperating world of thick paint.

YOU ARE READING
The ART of THICK PAINT
Non-FictionSpeed your painting journey by knowing the best techniques. Brad Teare expands and adds to the best of his Thick Paint Blog-a site dedicated to painting with thick texture.
